Note: This tutorial is a WIP as I started this blog after the fact – I will fill out the pictures over time as I get the opportunity.
Tools Needed
Required
- Impact Wrench
- Torque Wrench
- Jack stands OR QuickJack
- Floor Jack
- 22mm (Thin) Socket for 1 Top Nut
- Ideally, this would be a passthrough socket so you can fit a 10mm socket to hold the shaft in place
- 10mm Socket to hold shaft in place
- 13-14mm Socket for 5 Nuts
- 17mm Socket for 1 Brace Nut
- 6mm Hex Key for 4 Adjustment Nuts
- T30 Torx with compatible wrench for 1 Toe-Link Bolt
- 16mm Wrench for 1 Toe-Link Bolt
- 10mm Wrench for 6 Plastic Shroud Clips
- Blue 242 Loctite
Optional
- Camber + Toe Plates to adjust camber at home
Pre-Installation

Jack up the car onto jack stands – ideally all 4 corners but 2 could be sufficient

Remove front 2 wheels, pop open hood.
Remove plastic shrouds with 10mm wrench and unclip, and remove “Tupperware” (the rubber covers on the top-hats)
Installation

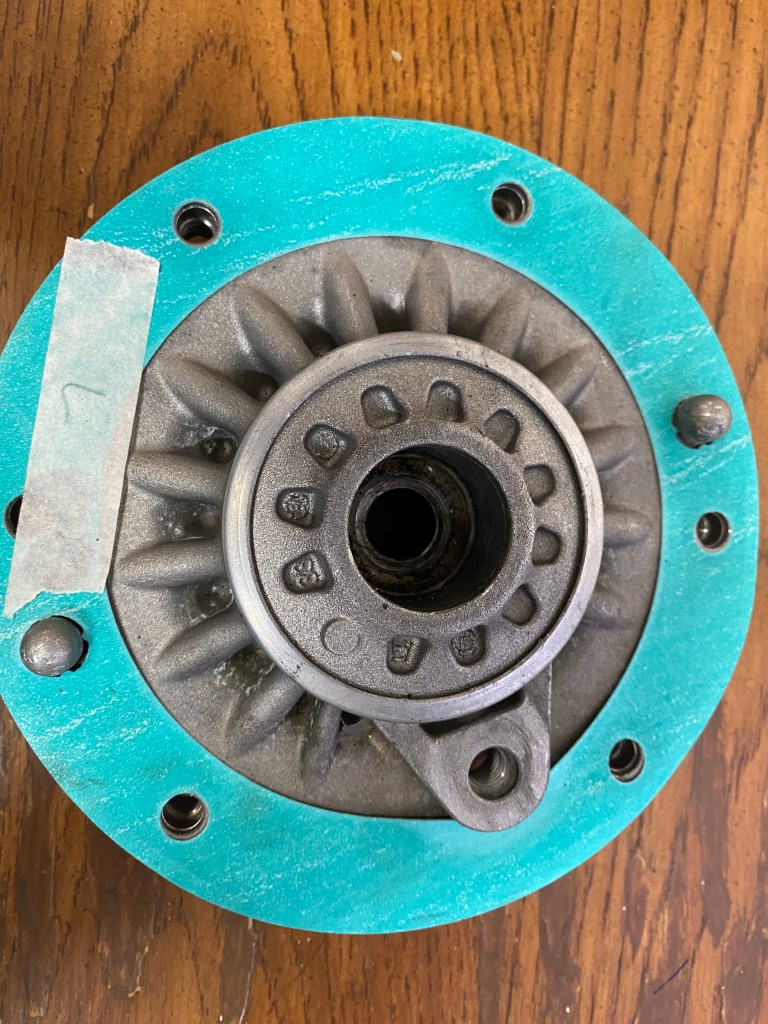
Out of the box with the 22mm top nut. Be aware which one is Right Front (RF) and Left Front (LF). The arrow points towards the front when installing.

Free ABS sensor line. On driver’s side, free the brake wear sensor line and undo bolt for level-sensor.

Tip: Use a needle-nose slyer to hold the right nut to prevent it from spinning.
Remove the toe-link bolt.
- Tip: Insert T30 Torx bit with ratchet/wrench to hold the bolt in place so it will not spin
- Place the other wrench over the bolt and loosen the bolt
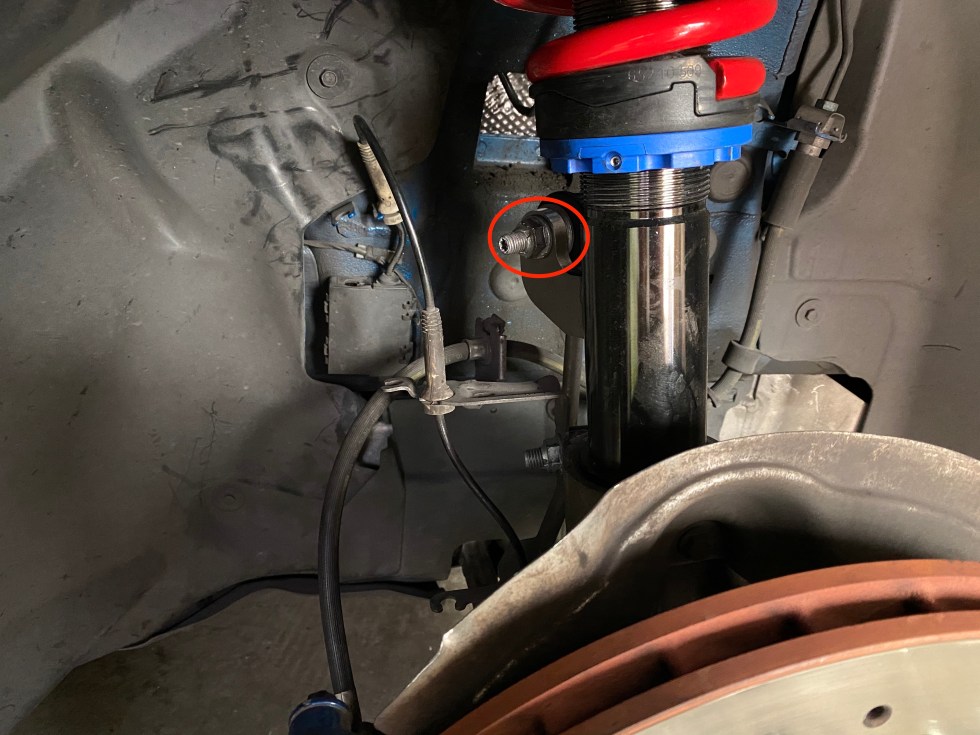
The correct way to remove the top nut is to use the passthrough 22mm socket and the 10mm socket to hold the shaft in place. However, if you do not have the passthrough socket, you can try using an impact wrench to free existing top nut with short pulses to prevent excessive spinning. This should only require a few pulses before the nut comes off.
Brace the suspension by placing a jack underneath the rotor and jack up slightly to provide slight upwards pressure.
Undo the 5 nuts and 1 brace nut
Slowly lower the jack until you can pull the old top-hat out.
Place the bottom washer onto the shaft
Place the camber plate onto the washer on the shaft
Slowly raise the suspension with the jack, aligning the camber plate bolts with the holes.
Important: Remember to place a washer in-between the plate and the brace.
Place 5 nuts and 1 brace nut (with washers) in place, but do not tighten yet.

Test hand threading the top nut onto the shaft – I found it tricky to engage the thread. Once you are sure you can do so, remove the nut and apply blue 242 l0ctite to the nut. 1-2 drops spread near the bottom of nut should suffice. Hand thread the nut back on again until it will not turn any more. Hit the nut with an impact gun and a 22mm socket 4-5 times, in short pulses to prevent excessive spinning.

Tighten 5 nuts (with washers underneath) to 18 ft-lbs, add 2 or so (for a total of 20 ft-lbs) due to the friction from the nylon lock.

Tighten the brace nut (with a washer underneath) to 30 ft-lbs, add 2 or so (for a total of 32 ft-lbs) due to the friction from the nylon lock.

Tighten the 4 adjustment nuts with 6mm hex key to 18 ft-lbs.
Replace suspension components.
Toe-Link bolt: 43 ft-lbs
- Tip: hand tighten with T30 Torx and wrench. Do not attempt apply 43 ft-lbs with Torx bit as it will likely break (ask me how I know). Once it is hand tightened, the bolt should not spin and you may torque it with your torque wrench
Level Sensor: Hand tighten

Installation complete

Post-Installation
- If you have a DIY alignment kit, you can dial in your camber. Be aware that adjusting the camber WILL affect the toe – more negative camber = more toe-out. Also note unless you have slip plates, this is a very cumbersome process as you will need to lower your car and drive it out of your garage and back in (I found that rolling back and forth was not sufficient to “reset” the suspension in a neutral position, thus throwing off the alignment values, but YMMV), then raise it up again to adjust the camber nuts.
- Once you have found a good camber setting for both front wheels (I have it set at -2.75 degrees), you can make a mark either with a pen or tape to save the setting, in-case it becomes out of alignment.
- Readjust toe to desired value, generally this is very close to 0 toe-in for track duty
- Or bring it to an alignment shop to properly set the values – I ended up bringing it to a shop to verify the values I set at home anyways as it was my first time using the DIY alignment kit